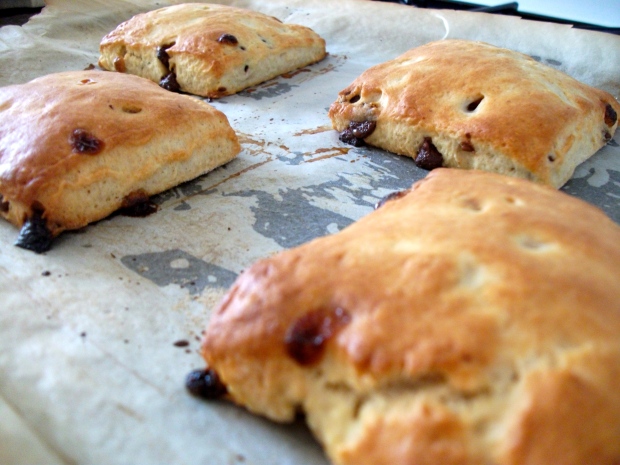
Jaffa Cakes

It’s been a while. In fact it’s been 41 days, 16 hours, 20 minutes and 49 seconds at the time of writing this post since I lasted uploaded something. Apologies for that. To be honest, I don’t really have an explanation, it’s just been one of those times when life takes over and my poor little baking blog gets pushed to one side. Nevertheless, I’ve still been in the kitchen and am finally ready to start sharing some of my baked treats with you. For this weeks post I’ve decided to go for something a little different to what I’d usually opt for and have a go at making my very own Jaffa Cakes. I know there’s the debate as to whether a Jaffa Cake is a cake or a biscuit however, since my own turned out HUGE, I think for now, I’ll settle on them being a cake.

INGREDIENTS
Orange Jelly Cubes
1 Orange
50g Plain Flour
50g Caster Sugar
2 Eggs
200g Dark Chocolate, melted

RECIPE

1. Zest the orange and set to one side. Dissolve the jelly in roughly 300ml of hot water and squeeze in the juice of the orange.

IMG_0904

2. Line a shallow baking tray with cling film. Pour the jelly mixture in and pop in the fridge to set.

3. Preheat an oven to 180ºc/Gas Mark 4, ensuring the shelving is centre.

4. Boil a pan of water and reduce to simmer. In a bowl over the water, whisk together the sugar, eggs and orange zest until pale and fluffy. This should take around 10 minutes.

IMG_0906

5. Carefully fold in the flour until throughly combined.

6. Grease a muffin tin with a little butter. Divide the mixture equally.

IMG_0908

7. Bake the cake in the centre of the oven for 10 minutes until golden and they spring back when touched.

8. Ease the sponges loose once cooled but keep them in the muffin tin.

9. Using a small circular cutter, cut 12 discs from the jelly sheet and place one on top of each cake.

IMG_0910

10. Melt the chocolate in either the microwave or over a pan of simmering water. Drizzle the chocolate to that it completely covers the top of the Jaffa Cakes.

11. Pop the Jaffa Cakes back in the fridge to set before removing them from the muffin tin.

IMG_0911

IMG_0913

Enjoy!

– Charlotte x

| Original Recipe Sorted Food |

| Previous Post Almond & Lemon Sponge |

Almond & Lemon Sponge

You may know from my previous posts that I absolutely love the flavours of lemon and almond, therefore when I spotted this recipe over on the lovely Tea With Erika’s blog, I knew that it would be something I’d just have to bake. The results were fabulous – a light and zingy lemon sponge with the delicious hint of almond. A perfect treat this summer!

INGREDIENTS
Cake

120g unsalted butter, softened
125g caster sugar
finely grated rind of 1 large lemon
2 large eggs
125g self-raising flour
65g ground almonds

Topping
60g granulated sugar
juice of 1 lemon, strained

METHOD
1. Preheat the oven to gas mark 4, ensuring the shelving is centre. Grease and line a round cake tin.

IMG_0213

2. Cream together the butter, sugar and lemon rind until light and fluffy.

IMG_0215

3. Add in the eggs one at a time. Gently fold in the flour and ground almonds.

4. Pour the cake batter into the lined cake tin and bake in the centre of the oven for 25 minutes or until golden brown and a skewer comes out clean.

IMG_0222

IMG_0223

5. Once the cake is cooled, mix together the sugar and lemon juice and drizzle over the cake.

IMG_0227

IMG_0225

Check out Erika’s blog here.

Enjoy!

– Charlotte x

| Previous Post One Direction Cupcakes |

One Direction Cupcakes

I’ve been a little hesitant about this review on the latest One Direction cupcake kit since I understand that the British boy band may not be to everybody’s taste. However, I thought they were a really fun idea, especially if you’re shopping around the supermarket with young children or if you’re anything like me, a near 20 year old still singing One Direction in your bedroom. You may find yourself just popping these in your trolley.

IMG_0230

Essentially these are just a simple chocolate cake with a buttercream icing, made exciting with a fondant face of one of the boys. Many cake mixes often only require you to add an egg and perhaps a little water, this cake mix however, asks for softened butter, and recommends mixing with an electric whisk. I’m pleased that I did follow this advice and used an electric whisk since I was a little worried when I opened the box to find a tiny packet of cake mix that looked like it’d struggle to fill 6 cake cases. Nevertheless, the mixture did double after whisking forming quite a mousse like cake batter, which was more than enough.

IMG_0232

IMG_0234

The cakes didn’t take very long to bake – perfect if you’re a little eager like me! Just like the cake batter, there was more than enough buttercream to pipe a fair amount on each cake. The only thing I found a little strange was that after emptying the frosting into a bowl, the instructions recommended using that same packet as a piping bag. Now, I’m not particularly neat when I bake, and especially if you’re baking with youngsters, the packet is very easily ripped. Having something spare, like your own piping bag is handy, or if not, simply spoon the frosting on top.

IMG_0238

The fun part is decorating your cakes with the fondant boys and I also added a few white chocolate drops, just for extra jazz. The only problem I had with the fondant heads was that in the morning, a couple had gone a little soggy after being at room temperature. Niall didn’t quite look the same the next day! Therefore I definitely recommend that you eat them on the day that they’re made.

IMG_0244

Harry and Niall are my favourite!

IMG_0242

The One Direction Cupcake Kit is available from most supermarkets, costing just a few pounds. If you’re looking for something to bake this weekend – perhaps give them a go!

Enjoy!

– Charlotte x

| Previous Recipe Victoria Sponge |

Victoria Sponge

Here in the UK, Wimbledon is well underway. Whilst I may not be the biggest fan of tennis, I am most certainly a fan of the strawberry and cream tradition associated with the sport. Therefore, I decided to bake this classic sponge in honour of the game where I even went and picked the strawberries myself.

INGREDIENTS
Cake:
200g caster sugar
200g softened butter
4 eggs, beaten
200g self-raising flour
1 tsp baking powder
2 tbsp milk

Filling:
100g butter, softened
140g icing sugar, sifted
drop vanilla extract
340g jar strawberry jam
icing sugar, to decorate
strawberries, to serve

METHOD

1. Preheat the oven to gas mark 5 ensuring the shelving is centre. Grease and line two sandwich tins.

2. In a bowl cream together the softened butter and sugar until pale and fluffy.

3. Gradually alternate between adding the eggs and sifted flour. Add in the baking powder. Stir in the milk and mix until thoroughly combined.

4. Divide the mixture equally between the two cake tins. Smooth the surface and bake in the centre of the oven for 20 minutes until a skewer comes out clean or until golden brown. Leave to cool in the tins before transferring to a wire rack.

5. For the filling, beat together the softened butter and sifted icing sugar. Add in the vanilla extract.

6. Spread the buttercream over the bottom of one of the sponge. Spread the strawberry jam over the other sponge and sandwich the two together. Dust with icing sugar and serve with a few strawberries on the side.

IMG_0200

IMG_0202

IMG_0206

Enjoy!

– Charlotte x

| Original Recipe BBC Victoria Sandwich |

| Previous Recipe Marble Cake Cupcakes |

Marble Cake Cupcakes

I’m a big fan of marble cake. I love all the snazzy patterns you see as you bite into it. Plus, chocolate and vanilla are just one of the best combinations. I spotted this recipe for marble cake cupcakes in a magazine by Tesco this week. I thought they were a nice idea for something a little different over the summer and they’re still super easy!

 INGREDIENTS
Cupcakes
150g (5oz) butter, softened
150g (5oz) caster sugar
175g (6oz) self-raising flour
3 medium eggs
50ml warm milk
3 level tbsp cocoa powder, sifted

Frosting
150g (5oz) butter, softened
250g (8oz) icing sugar

METHOD

1. Preheat the oven to gas mark 4. Line a 12-hole muffin tin with muffin cases.

2. Cream together the butter and sugar until light and fluffy.

3. Sift in the flour as well as alternating between adding the eggs and warm milk. Mix until smooth.

4. Divide the mixture between two bowls. In one stir in the cocoa powder.

IMG_0169

5. Alternate between spooning small dollops of the plain mixture and chocolate batter in the cake cases. Using a skewer or knife, swirl the two cake batters together. (But not too much or it’ll ruin the marble effect!)

IMG_0171

6. Bake in the centre of the oven for 25 minutes and until a skewer comes out clean. Leave to cool in the tin before transferring to a wire rack to completely cool.

IMG_0176

7. Mix together the softened butter and icing sugar until a smooth buttercream forms. Add a splash of milk if you need to.

8. Pipe or spoon a little buttercream onto each cupcake and decorate with sprinkles.

IMG_0184

Enjoy!

– Charlotte x

| Original Recipe Tesco Good Food |

| Previous Recipe Chocolate Chip Scones |

Chocolate Chip Scones

For as long as I can remember, I’ve had some kind of fear towards scones. It might sound a little strange but allow me to explain. When I was little, my Nan and Grandad would always smother baked treats such as scones and madeira cake with butter. Ever since, this has been something that I cannot get my head around and for the past fifteen years or so, I’ve refused to eat a scone! To me, having a scone with butter is just a no go. I know its still a popular choice among many but I am just not a fan! Anyway, I thought that it was time to get over this fear and I decided to bake my own, but this time with chocolate chips and a little jam and cream. Now that’s my idea of a scone!

INGREDIENTS
225 (8oz) self-raising flour, sieved
60g (2oz) butter
1tbsp caster sugar
50g (1 ¾oz) chocolate chips
roughly 150ml (5fl oz) milk

METHOD

1. Lightly grease a baking tray. Preheat the oven to gas mark 7, ensuring the shelving is centre.

2. Place the flour in a mixing bowl. Cut the butter in to small pieces and rub into the flour using your fingers until a the mixture forms fine breadcrumbs. DSCF3735

3. Stir in the caster sugar and chocolate chips.

4. Mix in enough milk to form a soft dough.

5. Roll out the dough on a lightly floured surface to a rectangle of 10 x 15cm or 4 x6 inches and about 2.5cm/ 1 inch thinck.

DSCF3736

6. Cut the dough into 9 squares.

DSCF3737

7. Place the scones on the baking tray ensuring they are well spaced apart.

DSCF3739

8. Brush each with a little milk and bake in the oven for 10 to 12 minutes or until golden brown.

scones with jam and cream

9. Slice the scones in half and serve with butter (ew!) or jam and cream.

DSCF3757

DSCF3759

Enjoy!

– Charlotte x

| Original Recipe Simply Baking at M&S |

| Previous Post Diggers |

Diggers

These are a chewy, coconutty, delicious kind of flapjack. I had never heard of diggers before, but they’re definitely worth a try!

INGREDIENTS
120g plain flour, sifted
225g caster sugar
100g oats
80g desiccated coconut
120g butter, melted
1tbsp golden syrup
1 level tsp of bicarbonate of soda
2tbsp boiling water

METHOD

1. Grease and line a square tin. Preheat the oven to gas mark 3/ 160°c ensuring the shelving is centre.

2. Mix together the flour, sugar and oats.

IMG_0096

3. Melt the butter in a small pan along with the golden syrup. Gently heat until melted.

IMG_0099

4. Mix the bicarbonate of soda with tablespoons on boiling water. Add to the butter and syrup mix.

IMG_0101

5. Pour the liquid mixture over the dry ingredients and mix together throughly.

IMG_0102

6. Tip and press down the mixture in the tin. Alternatively, you can shape into small cookies and place ion a boing tray.

IMG_0103

7. Bake in the oven for 20 minutes or until golden. If making as cookies, bake for 10 to 15 minutes.

IMG_0107

8. Cut into squares.

IMG_0109

IMG_0110

 Enjoy!

– Charlotte x

| Original Recipe Hairy Bikers Mum Knows Best |

| Previous Post Sweet Pear Sponge |
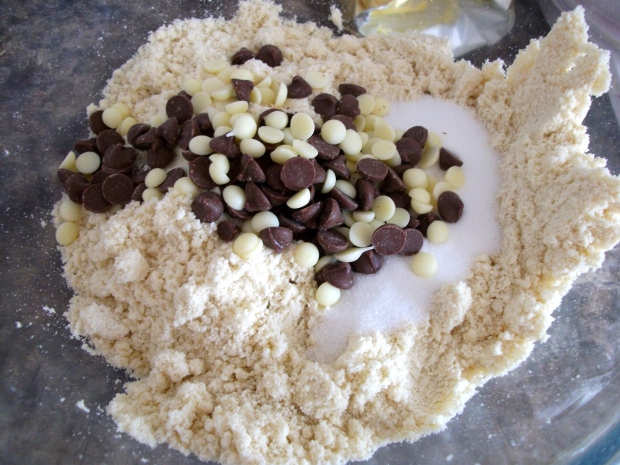
Sweet Pear Sponge

For my bake this week I decided to turn back to one of my favourite recipe books. I love the Marks & Spencers Simply Baking book because its recipes use ingredients that most of us have in our cupboard home. Since I was unable to decide which recipe was my favourite, I decided to start from the beginning with this sweet pear sponge.

INGREDIENTS
175g/6 oz butter, softened
175g/6 oz soft brown sugar
3 eggs, beaten
150g/5½ oz self-raising flour, sifted
15g/½ oz cocoa powder
2 tbsp milk
2 small pears, peeled, cored & sliced

METHOD 

1. Preheat the oven to gas mark 4, ensuring the shelving is centre. Grease and line a 23cm/8inch loose-bottomed cake tin.

2. In a bowl, cream together the softened butter and sugar until pale and creamy.

DSCF3714

3. Gradually add the beaten eggs. Ensure that you beat the mix throughly as steadily add the eggs.

4. Sieve the self-raising flour and cocoa powder into the cake batter and folder gently until the ingredients are combined.

5. Stir in the milk.

DSCF3715

6. Spoon the mixture into your prepared cake tin. Smooth the top with a spoon or knife.

7. Arrange the pear slices on top.

DSCF3716

(Hopefully you’ll do a better job at slicing the pears than I did!)

DSCF3717

8. Bake in the centre of the oven for roughly 1 hour or until the cake is firm to touch.

9. Leave to cool in the tin before transferring to a wire rack.

DSCF3718

DSCF3726

Enjoy!

– Charlotte x

| Recipe from Simply Baking at M&S |

Unfortunately, since the book is a little old now, I’m unable to point you in the direction of this specific book, however if you are looking for a new recipe book, I’d highly recommend that you check out the M&S baking range.

| Previous Recipe White Chocolate Blondies |

White Chocolate Blondies

Recently I’ve seen lots of recipes across the blogging world for blondies. I must admit, prior to seeing these posts, I had never heard of a blondie! From what I can tell, a blondie simply is a brownie but without the chocolate. It really makes sense when you think about it! Anyway these were really yummy and a nice change to your usual chocolate brownie. However, the only thing that disappointed me was that the white chocolate sank to the bottom of the brownie so I didn’t get the perfect brownie with the chocolate evenly dispersed as I had imagine. Nevertheless, from my research, a tip is to supposedly dust the chocolate in flour before you add it to the cake batter. Perhaps keep that in mind!

INGREDIENT
225g Caster Sugar
4 Large Eggs
225g Butter, melted
150g Plain Flour, sifted
200g White Chocolate, chopped

METHOD 

1. Preheat the oven to gas mark 4. Grease and line, ideally a 20cm baking tin.

2. Beat together the sugar and eggs until pale.

DSCF3679

3. Melt the butter and gradually add to the sugar and eggs a little at a time.

4. Sift in the flour and fold with a metal spoon.

DSCF3680

(Don’t panic if your mixture looks like this! Keep going!)

5. Chop up the chocolate and carefully fold into the batter.

DSCF3683

6. Pour into the tin making sure the chocolate is evenly distributed. (I saved a little chocolate back to add on top once the batter was in the tin) Bake in the centre of the oven for 35 to 40 minutes until a skewer comes out clean.

DSCF3684

DSCF3686

7. Leave to cool in the tin before removing. Cut into squares and dust with a little icing sugar.

DSCF3690

Enjoy!

– Charlotte x

| Original Recipe by Sainsburys | | Previous Recipe Jam & Cream Butterfly Cakes |

| Follow on Facebook Bake With Me Blog |

Coconut Bars

Now I say Coconut bars, but to be honest, they turned out more like boulders – nothing like the nice neat bars I had visioned on creating. Nevertheless, these coconut bars were creamy and delicious, best served straight from the fridge.  When it comes to covering them in chocolate, it does get a little messy, but that’s just part of the fun, right?!

INGREDIENTS
200g Desiccated Coconut
397g Condensed Milk
300g Milk Chocolate

METHOD 

1. Line a baking tray with greaseproof paper.

2. In a bowl, mix together the desiccated coconut and condensed milk.

3. Take small handfuls of the mixture and shape into bars.

photo 1-5

4. Place in the fridge to harden up slightly before covering with chocolate. (I left mine for an hour but 30 minutes should be fine)

5. Melt the chocolate either in the microwave or over a hob, making sure the bowl avoids touching the water. Once melted, spoon the melted chocolate over the bars and place back on the grease proofed baking tray.

photo 2-5

6. Place back in the fridge for half an hour or until completely set.

photo-19

Enjoy!

– Charlotte x

| Original Recipe Homemade Bounty Bars | | Previous Recipe Maltesers Cupcakes |

| Follow on Facebook Bake With Me Blog |